
Reticulum is digital infrastructure for building networks - local networks in your house, or more widely available networks connecting people in a community or even globally.
You can think of it as a toolbox for building what is essentially an alternative internet, an internet which cannot be surveiled, censored, and controlled by outside forces.
Nerd stuff
When you use Reticulum, instead of routing traffic through central servers with an IP-register and so on, traffic and connections are made between individual instances using Reticulum - in a manner which is similar to how e.g. the Fediverse (lemmy, mastodon, pixelfed, etc.) operates. Big deal, right? It's still just a network stack for making sure data goes from A to B via intermediaries.
Yes - and no - because (quoting from the Reticulum website here)...
- Reticulum does not use source addresses. No packets transmitted include information about the address, place, machine or person they originated from.
- There is no central control over the address space in Reticulum. Anyone can allocate as many addresses as they need, when they need them.
- Reticulum ensures end-to-end connectivity, newly generated addresses become globally reachable in a matter of seconds to a few minutes.
- Addresses are self-sovereign and portable. Once an address has been created, it can be moved physically to another place in the network, and continue to be reachable.
- All communication is secured with strong, modern encryption by default.
This is all nerd-speak for one thing; the networks built by you using Reticulum cannot be meaningfully surveiled, censored, and controlled by outside forces. It's your network, plain and simple, and you can make it as small or large as you want to.
It also runs on everything and can interface with everything - LoRa, TCP, UDP, I2P - so if you're interested in solarpunk or transportable resistance infrastructure it'll also be worth looking into.
The main question facing those who want to get into Reticulum is - what are you looking to do? In this guide, I want to outline three scenarios:
- Scenario 1: You want to chat with people over the Reticulum network
- Scenario 2: You want to explore the NomadNet - a 1980s style alternative internet
- Scenario 3: You want to join the mesh - become one with the NomadNet
In reality, you probably want to do several of these, but it's easier to explain them separately.
Scenario 1: Chat with people
If all you want to do is connect with other people - friends, family, or strangers - you can simply install the Android-app Columba. It's a pretty good looking messaging & voice app which is under heavy development right now and is really shaping up to be great.
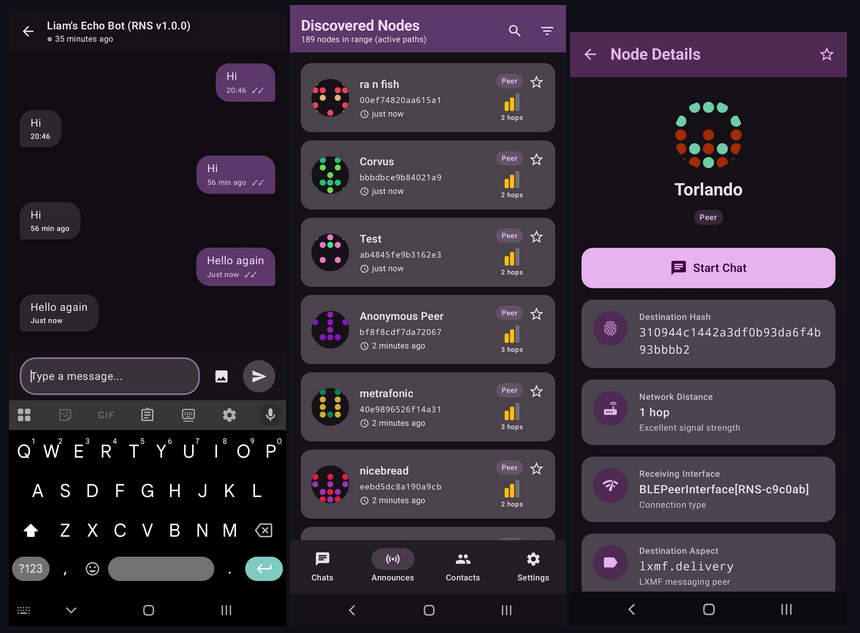
It's not available on the Google Play Store, so you have to open the github repository linked above, switch to the releases page, and find the .apk file which matches your system (or select the file ending in beta-universal.apk file if you're not sure).
Download and install it, and the app should take you through the setup process.
By default, any app using reticulum will allow you to talk to people on the same wifi/ethernet network, but the neat thing about this app is that it has automatic interface discovery. Turn it on (or leave it on, can't remember if it's on by default), and the app will automatically connect to other reticulum nodes in range and connect to the wider world.
Once you're this far, use the app to scan my QR code and send me a message to verify that you're set! You may have to wait a bit while Columba figures out how the local network looks and how to trace a path to me.

Columba isn't your only option for messaging people, of course - but it's the most accessible option and a good starting point.
Nerd stuff
Columba doesn't just connect to other Columba-apps, it also allows you to message people who are on other clients - like Sideband, a proof-of-concept app from the creator of Reticulum. Decidely not ready for the masses, but then on the plus-side it works on Android, Linux, macOS and Windows.
Two other clients - NomadNet and MeshChat - are covered in the next section.
Scenario 2: Explore NomadNet
Another interesting app which uses Reticulum is NomadNet. It runs in a terminal - which gives it a certain 1980s charm and also you feel like a film-hacker:
It does three things:
- It can send messages to and from other nodes - e.g. your Columba-app
- It has a built-in browser for visiting NomadNet pages
- It allows you to create your own NomadNet pages
So it's sort of like a messaging app + browser app + web server in one glorious retro-package.
Installing NomadNet
NomadNet is quite well documented - but if you're new to using a terminal, or can't figure the linked install instructions out, you can fold out my instructions below and hopefully they're more thorough.
Beginner instructions (Ubuntu)
These instructions are for installing NomadNet and all related utilities on a fresh Ubuntu 25.10 - adjust as necessary 😄 Since pip is cross platform, it should get you far on Windows as well though you will have to install Python and pip in a different manner.
- First make sure you're running the latest version of your system with
sudo apt updateandsudo apt upgrade - Install python with
sudo apt install python3 - Then install the package manager
pipwithsudo apt install python3-pip - Use
pipto install Reticulum Network Stack withpip install rns. - Your system will likely complain that this is an externally managed environment and yada yada yada. Force the insolent machine to do your bidding by adding the --break-system-packages directive (which won't, in fact, break anything):
pip install rns --break-system-packages - With the machine duly put it its place, install the Lightweight Extensible Message Format package via
pip install lxmf --break-system-packages - Finally, install NomadNet via
pip install nomadnet --break-system-packages
That's it! You're done!
Once the application has been installed, simply type nomadnet in the terminal to start the application:
It will present you with a First Run guide and is generally quite user friendly for a terminal app. But don't worry, I will still teach you what to do! 😃
Adding interfaces to the configuration file
By default, you should be able to go to the Network-tab (keyboard or mouse) and see any Reticulum-devices on the same wifi/ethernet that you're on - for instance a Columba app you have installed.
You may have to open the Settings > Auto Announce section of the Columba-app and press Announce Now for it to show up.
If you want to connect to the outside world, though, you need to edit the configuration file for your Reticulum and tell it which interfaces it can use. The config file is located inside a hidden folder called .reticulum. You can access it from your terminal easy enough:
cd .reticulumInside this folder is a config file - you can edit it in any text editor you want to - on my system (Ubuntu) I use Nano text editor:
nano configAt the bottom of this file there's an interfaces section with the content:
  [[Default Interface]]
    type = AutoInterface
    enabled = yes
This is the default wifi/ethernet interface - below this you can add more interfaces as you decide on how you want to connect to the network, you can read the details in the Reticulum Manual. For now, try out a couple of the interfaces I've found pretty reliable:
  [[R-Net TCP]]
    type = TCPClientInterface
    interface_enabled = true
    target_host = istanbul.reserve.network
    target_port = 9034

  [[RNS_Transport_US-East]]
    type = TCPClientInterface
    interface_enabled = true
    target_host = 45.77.109.86
    target_port = 4965

  [[DE Nuremberg noDNS1]]
    type = BackboneInterface
    enabled = true
    target_host = 202.61.243.41
    target_port = 4965
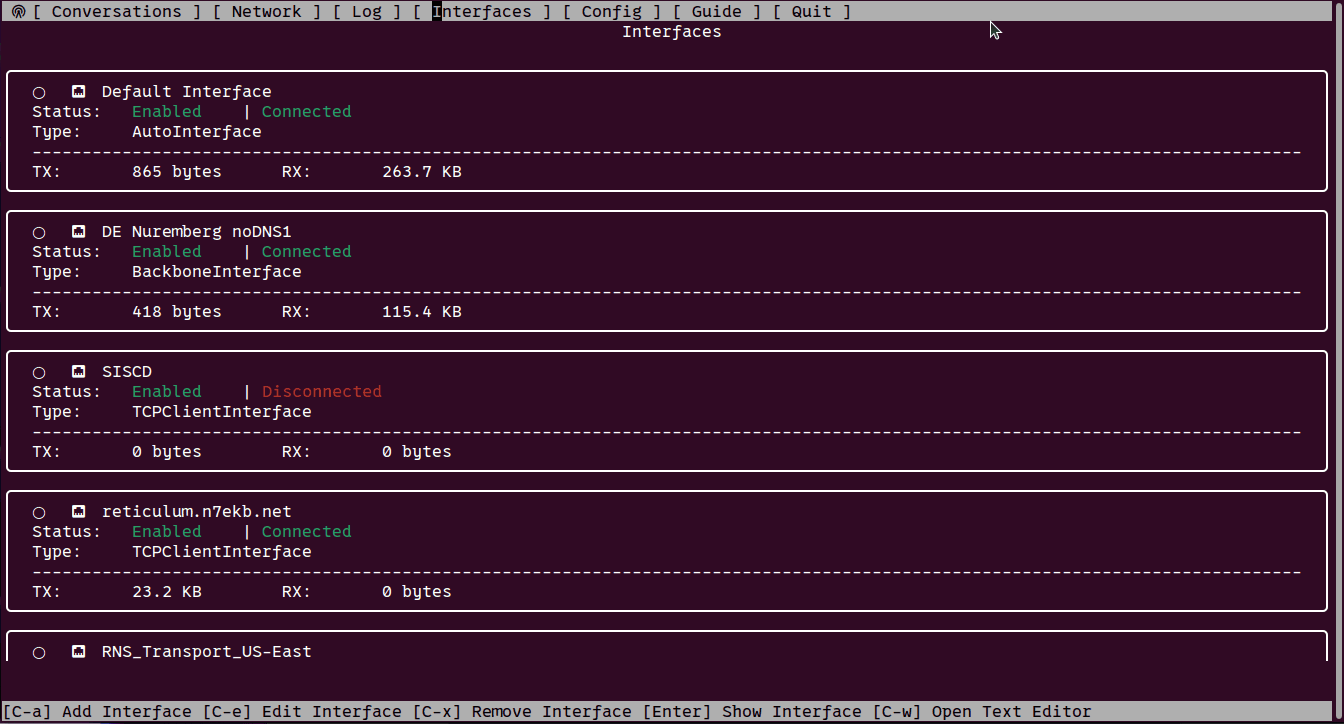
Copy these into the config file, save, then restart NomadNet. Switch to the Interfaces tab and verify that you're connected to some interfaces:
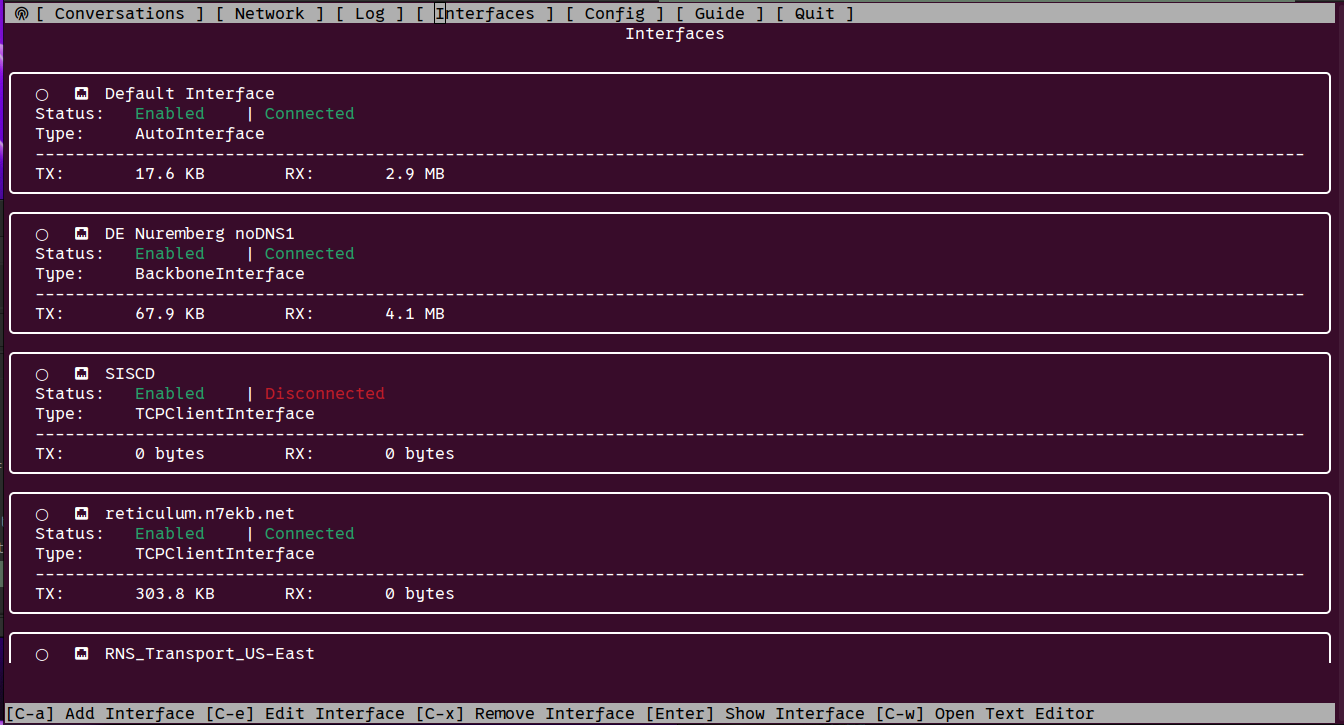
It might take a while for your instance to pick up other nodes, so don't think something's broken if you don't see much activity to start with.
I spent the longest time debugging an issue on my server until I figured out I had to open for traffic on ports
29716 and 42671 in my firewall settings.Conversations
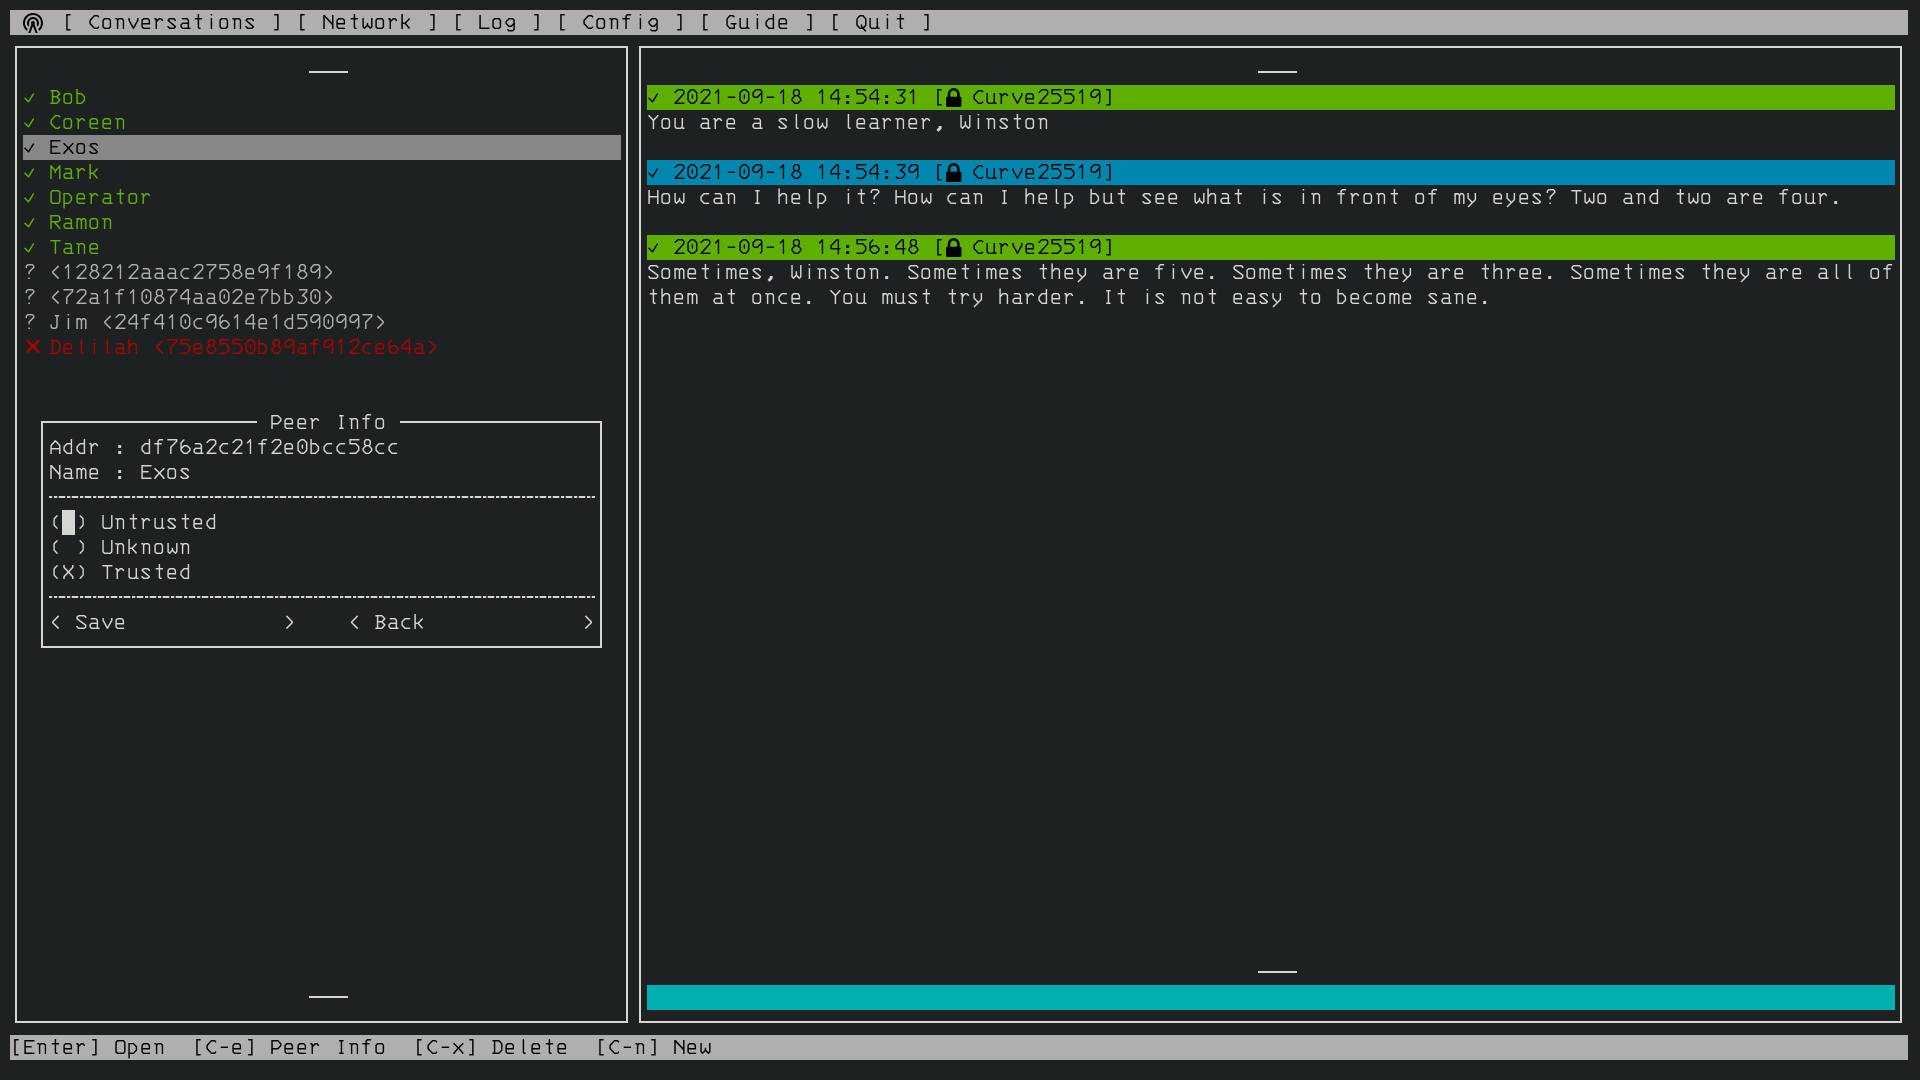
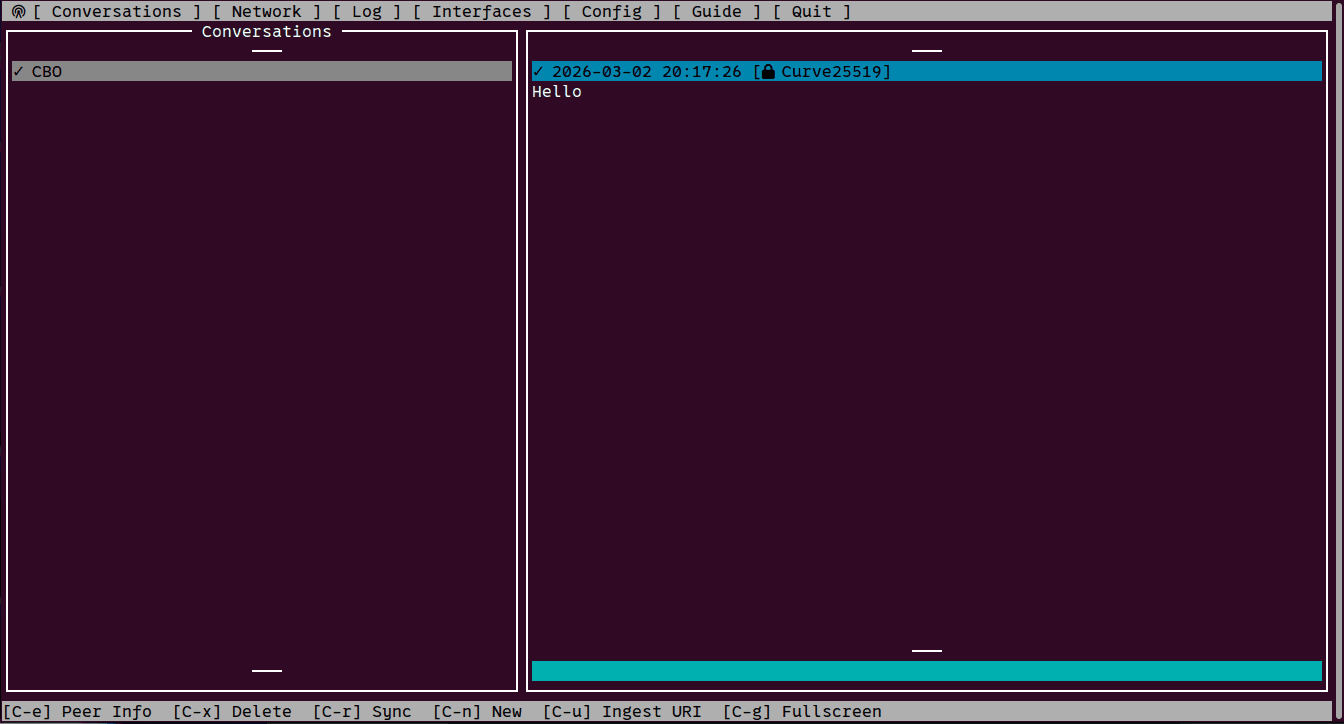
Ok, so the first thing you want to do is try to write to someone:
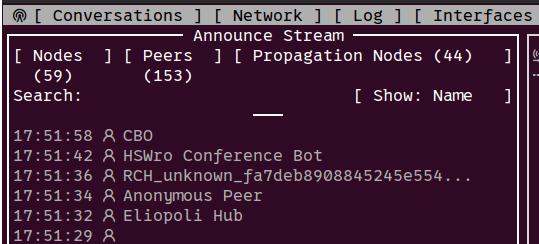
- Switch to the Network-tab and press arrow down, then hit CTRL+L to open the announce stream
- Use arrow keys to navigate to a peer, then enter to confirm, select Converse and press enter - this takes you to the Conversations-tab
- Write a message, then use the shortcut ctrl+d to send the message
Look, I know this is different - you'll get used to it!
There are other shortcuts listed at the bottom the screen, in every case C means Ctrl. You can also Save specific peers and mark them as trusted, that sort of thing, but we're just covering the basics here.
Browsing the NomadNet
Next, try to browse the NomadNet - these are the websites that other users have set up:
- Use the arrow keys + enter to open the Network-tab. CTRL+L to open the announce stream if it's not already open
- Arrow down+left to select the Nodes list, then connect to a page you think looks appealing
- The selected node will load in the right-side browser window (or time out, in which case you can try another node)
It's all very old school - old school cool? - and there are plenty of enthusiasts out there building little interesting projects. So browse around for a while and enjoy being at the cutting edge of things in a destinctly retro way.
Since this is obscure and off-grid you'll find a wonderful collection of all the greats; engineers and radio enthusiasts, left wing and right wing radicals, preppers, the paranoid, dudes who built a thing in their backyard, you know - people like us :)
Some cool nodes to visit (connection permitting):
- The Nomad Index: 47850a3b99243cfb1147e8856bab2691:/page/index.mu
- The Nomad Forum: c684e0ce02bb2a757116a43bf2b277ec:/page/index.mu
- The Chat Room: d251bfd8e30540b5bd219bbbfcc3afc5:/page/index.mu
- The Library: a2d4202e63899b472449c27d3e951257:/page/index.mu
- Reticulum Denmark: bae5e6a61450d129fc8bc766bdfe2473:/page/index.mu
The last one's not super interesting, but it is my site - so I'll be looking to do stuff with it in the future. You can use CTRL+U to open an URL directly, though it will time out if you're not connected on the mesh.
Scenario 3: Become one with the mesh
So to become one with the Mesh you need to install the rns and lxmf packages on your neural network, you do this by plugging in the cable at the back of your head and...
Ok, so maybe you're not really looking to become one with the mesh - but you can still contribute to making the mesh stronger. The way the mesh works, every node automatically participates in the mesh and helps distribute traffic between nodes. Some nodes, however, act as propagation nodes which auto-connect to each other to form the backbone of the mesh. That's good, we like propagation nodes.

So how do you create a propagation node? The easiest way is to run a NomadNet instance on a computer which is always online - a server - and edit the config file to act as a propagation node and web server. You then create a service which makes sure NomadNet is started in daemon-mode (with no UI) whenever the computer is restarted.
As a bonus, you get to build your own "6G is killing the bees" or "Here's everything I know about knitting" website one the NomadNet. I mean, dream come true - right?
Install NomadNet on the server
So first you install NomadNet on your server in the exact same manner as you did on your other machine, configure connections in the .reticulum config file, and make sure everything runs as it should - easy peasy, you've done it before.
Also, if you have connection problems they might relate to ports
29716 and 42671 being closed in your firewall settings.Configure NomadNet to serve pages
Next, open NomadNet and navigate to the Config-section and press Open Editor to open the, well, config file for NomadNet.
Find the [client] section and edit it:
[client]

enable_client = yes
user_interface = text
downloads_path = ~/Downloads
notify_on_new_message = yes

# By default, the peer is announced at startup
# to let other peers reach it immediately.
announce_at_start = yes
You should change enable_client = yes to enable_client = no, notify_on_new_message = yes to notify_on_new_message = no , and announce_at_start = yes to announce_at_start = no .
Scroll down to the [node] section:
[node]

# Whether to enable node hosting
enable_node = no

# The node name will be visible to other
# peers on the network, and included in
# announces.
node_name = None

# Automatic announce interval in minutes.
# 6 hours by default.
announce_interval = 360

# Whether to announce when the node starts.
announce_at_start = Yes

# Some more text

disable_propagation = Yes
You should change enable_node = no to enable_node = yes, you should specify a node_name, and you should decide if you want the node to announce_at_start - which, if you want people to be able to notice your node, you want to. To enable propagation node switch disable_propagation = Yes to disable_propagation = No.
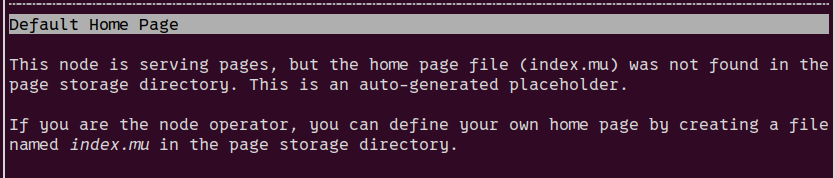
Save, quit, and restart NomadNet - you should now see your own node being announced in the Nodes stream on the Network tab - try to connect to it. You should see this message:
Ok, so.... let's do that, shall we?
Creating a NomadNet page
"So where exactly is the so-called page storage directort mister know-it-all?" I thought to myself as I mucked about in the terminal until I found, well, the page storage directory under /.nomadnetwork/storage/pages. Oh... right.
In this folder, create a file called index.mu with the following content:
I'm a little teapot
Short and stout
Here is my handle
Here is my spout
When I get all steamed up
Hear me shout
Just tip me over and pour me out!
Or really - anything you want to. Save and restart NomadNet on the server and verify that your node now serves the new index.mu file when you connect to it.
NomadNet pages use a markup-language called micron which allows you to style text and so on - you can play around with micron using this lovely playground. There's also a short description of micron under Guide > Markup in NomadNet.
People who are much much cleverer than me have also created cool projects you can use:
- lxmf-quick-chat - add a simple chat to your page
- rns-live-streaming - stream via RNS
- NomadNet-Pages - some example pages for inspiration
- lxmf_messageboard
- nomadForum - add a forum to your node
And so on and so forth - the most important thing is, of course, to have fun!
Bonus: Start rns and NomadNet on system boot (Ubuntu)
The final thing I want to cover is how to make sure rns and NomadNet automatically start when your server or computer boots up - mainly to make it easier for your to host your node without having to faff about on your server everytime you update something.
This is not really a Reticulum-thing - but I've put it here none the less. My server runs Ubuntu, but it should be similar on other machines and I am sure there are ways to do the same on a Windows-server but I don't know how 😄
On Ubuntu, the easiest way is to use systemd to run the commands you want to execute at startup. First create and open a new service file:
sudo nano /etc/systemd/system/reticulum.serviceAdd this content to the service-file and replace username and paths to scripts as appropriate:
[Unit]
Description=NomadNet and RNSD Service
After=network.target

[Service]
Type=simple
ExecStart=/bin/bash -c '/usr/bin/nomadnet --daemon && /usr/bin/rnsd'
Restart=always
User=your_username
WorkingDirectory=/home/your_username

[Install]
WantedBy=multi-user.target
This service executes both nomadnet and rns in daemon-mode on boot (rnsd is rns in daemon mode). You can check which paths to use on your system by executing which rnsd and ẁhich nomadnet in the terminal.
Reload systemd:
sudo systemctl daemon-reloadEnable the service:
sudo systemctl enable reticulum.serviceStart the service:
sudo systemctl start nomadnet-rnsd.serviceCheck the service status to verfy that it's active:
systemctl status reticulum.serviceIf it's inactive/dead - it might be because you've got rnsd and nomadnet running already. Stop your currently running rnsd and nomadnet instances and then start the service manually using:
sudo systemctl start reticulum.serviceWhen appropriate - for instance when you've added new content to your node - you can restart your service using:
sudo systemctl restart reticulum.serviceGood luck!